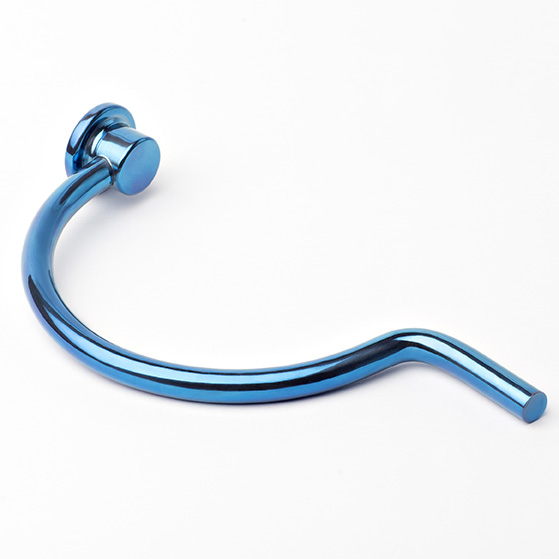
Salgado Driver
In cases with dense bone or limited space, finger pressure may not be enough to fully secure the Hemorrhage Occluder Pin in the sacrum. The Salgado™ Driver provides surgeons the additional force required to ensure the Pin is seated correctly. The Salgado Driver is a must-have for any OR that stocks the Hemorrhage Occluder Pin.
Features
Available in Two Sizes
For pricing and ordering information, contact (714) 832-6300 or hop@surgin.com.
Catalog Numbers and Descriptions
| Catalog # | Description | Packaged |
|---|---|---|
| CR1007 | Hemorrhage Occluder Pin with Applicator - Standard | 2 Pins/box, Sterile |
| CR1014 | Hemorrhage Occluder Pin with Applicator - Large | 2 Pins/box, Sterile |
| CR2000 | Salgado Driver – Standard | 1/box, Non-sterile |
| CR2005 | Salgado Driver – Large | 1/box, Non-sterile |
Pricing is subject to change
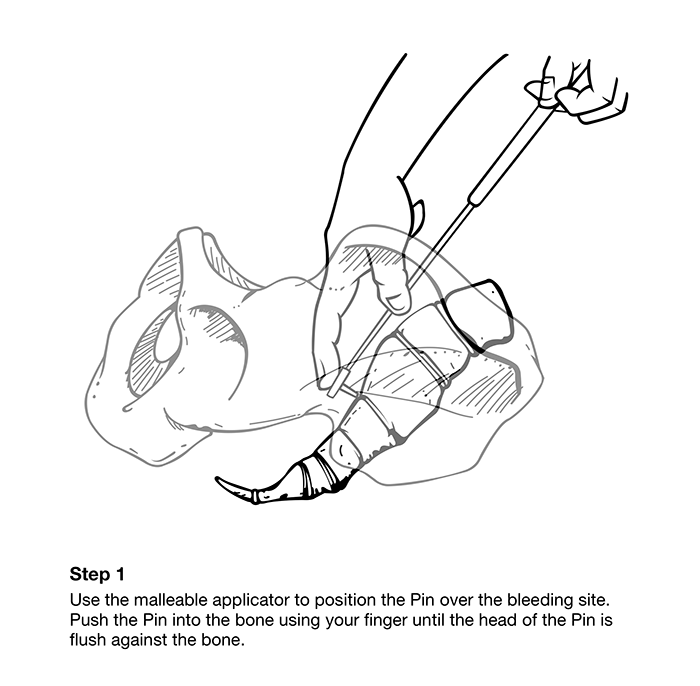
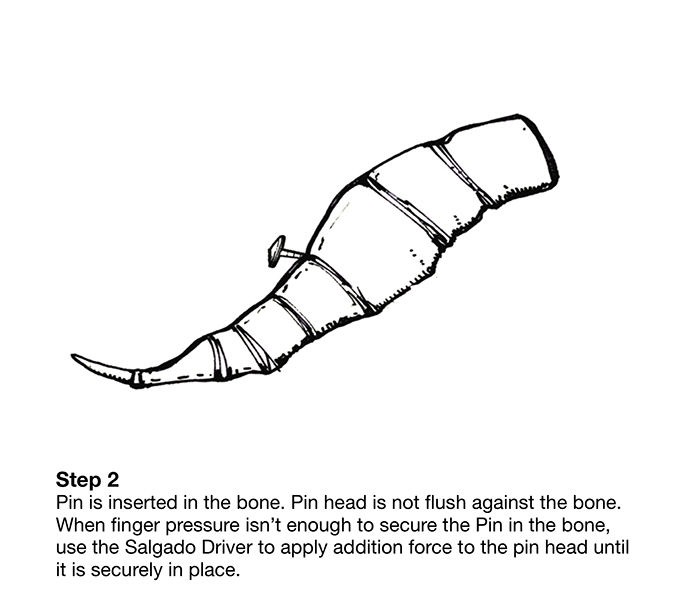
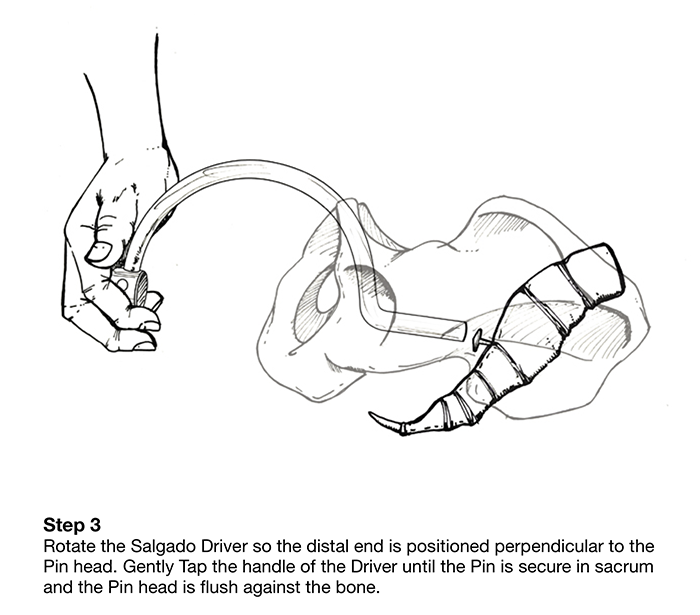
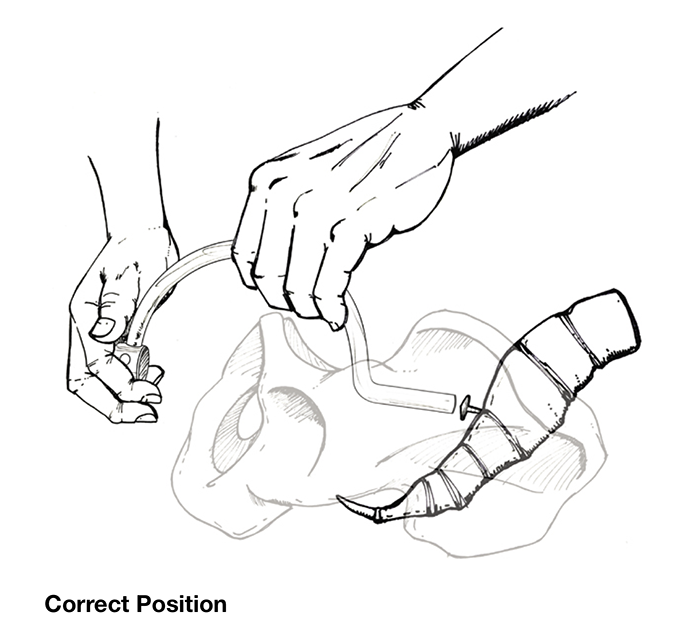
Instructions for Use

IMPORTANT
IMPORTANT
- Salgado Driver is supplied non-sterile and is intended for reuse.
- Do not use any part that appears to be defective.
- Surgin disclaims any and all responsibility and liability concerning the use of this product or any component herein, if it is reused, abused, misused, damaged or used contrary to the instructions contained herein.
Cleaning Instructions
Rinsing
Cleaning
Ultrasonic Cleaning
- Instrument should be processed in a cleaner for the full recommended cycle time – usually 5 to 10 minutes.
- Place instrument in the ultrasonic cleaner. Instrument has to be fully submerged.
- Do not place dissimilar metals (stainless, copper, chrome plated, etc.) in the same cleaning cycle.
- Change solution frequently – at least as often as manufacturer recommends.
- Rinse instrument after ultrasonic cleaning with water to remove ultrasonic cleaning solution.
After Cleaning
Automatic Washer Sterilizer
Manual Cleaning
Most instrument manufacturers recommend ultrasonic cleaning as the best and most effective way to clean surgical instruments. If ultrasonic cleaning is not available, observe the following steps:
- Use stiff plastic cleaning brushes (nylon, etc.)
- Do not use steel wool or wire brushes.
- Use only neutral ph (7) detergents because if not rinsed off properly low ph detergents will cause breakdown of stainless protective surface and black staining.
- High ph detergent will cause surface deposit of brown stain, which will also interfere with smooth operation of the instrument.
- Make sure all instrument surfaces are visibly clean and free from stains and tissue.
- After scrubbing, rinse instruments thoroughly under running water.
Sterilization Instructions
Surgin recommends the following AAMI guidelines for steam sterilization.
If sterilized with porous materials:
Standard Cycle
Sterilization time: 10 minutes
Temperature: 132˚C (270˚F)
Prevacuum Cycle
Sterilization time: 14 minutes
Temperature: 132˚C (270˚F)
If sterilized with non-porous materials:
Standard Cycle
Sterilization time: 3 minutes
Temperature: 132˚C (270˚F)
Prevacuum Cycle
Sterilization time: 3 minutes
Temperature: 132˚C (270˚F)